
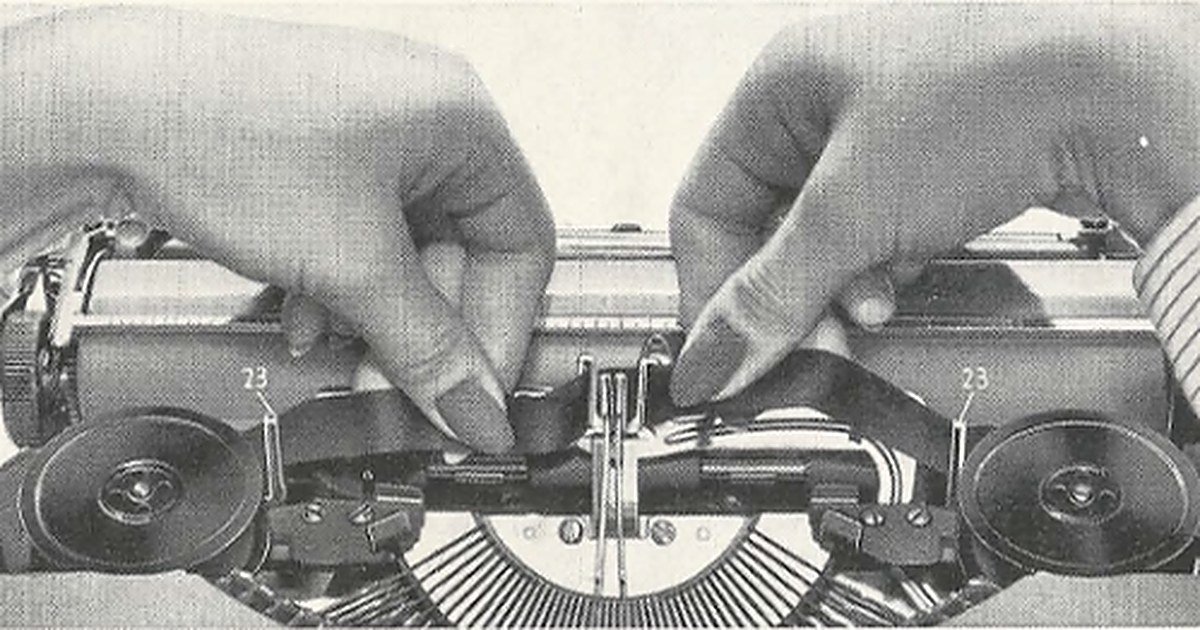
How to change the ribbon on a typewriter
A fading line, letters only half printed: nine times out of ten, it's not the machine, it's the ribbon. Changing it takes five to ten minutes and needs no tools — as long as you know which ribbon-holder system your machine has, because they are not all threaded the same way.
This guide covers two-spool mechanical typewriters, from the 1920s to the 1980s: Hermes, Olivetti, Olympia, Japy, Underwood, Remington, Royal, Brother, Continental, Triumph, Adler — including the most sought-after models. The ribbon's path is always the same in principle. What changes from one model is the part that lifts the ribbon in front of the typebars — and that is what decides how you thread it.
Before you start
Find your ribbon reference in 10 seconds
Browse our ribbons by brand and model, or send us a photo of your machine and we will tell you the exact reference.
1Spotting a worn ribbon
The three signs, in the order they appear
The ribbon is a strip of fabric soaked in ink. With each keystroke, the character presses it against the paper — it is the impact that deposits the ink. Over time the strip runs dry and the typing fades. Three signs never lie:
- a pale, grey rather than black line;
- letters that are only partly printed, especially the solid ones like O or M;
- a steady loss of contrast that gets worse toward the end of the spool.
A new ribbon fixes all three at once. You can see the difference from the first line — see the ribbons in stock at the workshop.
2The ribbon's path
The route, from one spool to the other
On all of these machines, the ribbon follows the same route: it leaves one spool, goes around a side guide, passes through the part that lifts it to the point of impact, reaches the second guide, then winds onto the other spool. When the take-up spool reaches the end of its travel, a mechanism reverses the direction and the ribbon runs the other way.
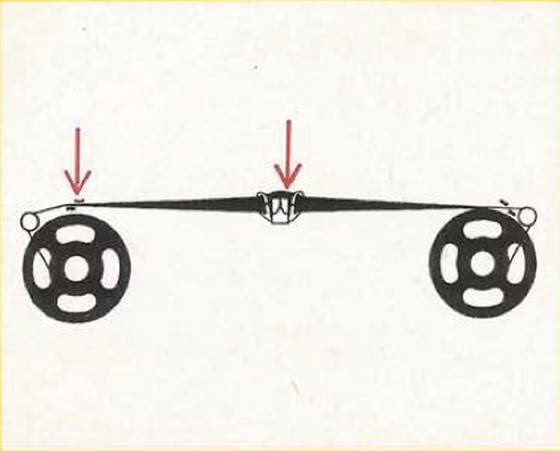
Plate from a period manual
1 The spools — they carry the ribbon and pull it from one side to the other.
2 The side guides — small rollers, pins or slots that hold the ribbon flat between the spool and the centre.
3 The ribbon holder — also called the fork, vibrator or ribbon lifter. It raises the ribbon in front of the hammer at each keystroke, and it is the part that differs from one model to another.
Before touching anything, photograph the ribbon's path with your phone: an overall view, then a close-up of the ribbon holder. Thirty seconds, and you have the reassembly plan for your machine — the one that counts, not the one for another model.
3Getting the machine ready
What you need, and your model's spools
- a new ribbon with the right reference — if in doubt, send us a photo of your machine ;
- a a sheet of paper for the final test;
- possibly a pair of tweezers, handy on ribbon holders with narrow slots.
Your machine's spools
A new ribbon comes wound on its two spools, ready to fit. In the vast majority of cases the job comes down to a swap: you remove the two old spools, put the new ones in their place, and all that remains is to pass the ribbon through the guides and the ribbon holder.
Removing the old spools
The spools are held on their shaft in one of three ways, and a glance tells you which one you have:
- a ratchet or a side tab that you push aside with a finger to release the spool;
- a drive wheel or a lug that you lift a quarter turn;
- nothing at all : the spool simply lifts off its shaft.
In all three cases, start by freeing the ribbon from the ribbon holder, then from the side guides, and only then take out the spools. In that order, nothing pulls and nothing tears.
Fitting the new ones
The new spools go exactly where the old ones were, red side down if it is a two-colour ribbon. Check that they turn freely in their housing and that the ratchet or lug holds them firmly: it is what drives them, and a badly seated spool won't advance.
That leaves the passage through the ribbon holder. This is where machines really differ, and it is the subject of the section Threading the ribbon through the ribbon holder below.
The special case: transferring
Some machines have spools that are specific to the model — diameter, thickness, shaft shape, hook position — or held by a fixed ratchet that cannot be taken apart without a tool. In that case you keep the machine's own spools and do a transfer : you unwind the new ribbon from its original spools and wind it onto the ones already in place.
- Remove the old ribbon and leave the machine's two empty spools on their shafts.
- Hook the end of the new ribbon onto one of them.
- Turn that spool by hand, letting the ribbon unwind from its original spool, which you hold in your other hand.
- Watch how it stacks: the ribbon must wind flat and untwisted, in even layers. A slanted winding ends up rubbing against the flanges and slowing the feed.
- Once all the ribbon has been transferred, hook the other end onto the second spool, then wind back about twenty centimetres the other way: that gives you the free length you need to thread the guides and the ribbon holder without hurry.
Send us a photo of your machine — ideally with the cover open and the spools visible. We will tell you exactly which ribbon you need.
4What to do before threading
Freeing the ribbon holder, and the ribbon direction
At rest, the ribbon holder sits low, tucked against the carriage, and you can't get at it. Period manuals all give the same trick, and it still works perfectly:
- If your machine has a two-colour selector, push it to red: the ribbon holder rises to its highest position.
- Engage the shift lock (the key that locks capitals).
- Strike two keys in the middle of the keyboard at the same time, fairly firmly: the two typebars jam against each other at the point of impact and stay hooked up in the air.
The jammed typebars hold the ribbon holder up. You have both hands free and a clear view of the part. At the end of the job, you just release the two typebars and the shift lock and everything drops back down.
Ribbon direction
The colour selector raises or lowers the ribbon in front of the typebars. Fitted upside down, it reverses everything: you type in red when you ask for black. On a machine with an all-black ribbon — the most common case — the question doesn't arise, but everything else applies.
The winding direction matters as much as the colour. The ribbon must leave each spool on the same side, otherwise it twists on the way and rubs against the guides. On most machines it comes off over the top of both spools.
A few models do the opposite. The mark engraved on the machine, or the photo you took before dismantling, always settles it: trust them rather than habit.
5Threading the ribbon through the ribbon holder
Three main shapes — find yours
This is the heart of the matter, and the reason why a manual found at random almost never matches your machine. The part that lifts the ribbon in front of the typebars takes three main shapes. These are the ones most often seen at the workshop; there are others, and a few machines combine two.
To identify yours, free the ribbon holder and look at the part that holds the ribbon just in front of the point of impact:
- two thin prongs in the centre and two curved tabs at the sides → the fork ;
- a solid plate with two vertical slots → the slotted plate ;
- a U-shaped piece with two small hooks open upward → the hooked U.
The fork
European portables

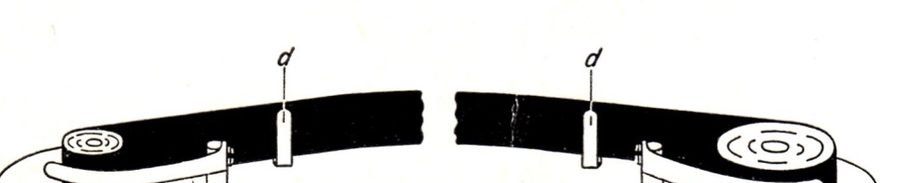
Plates from a period manual, in French
The fork has two thin prongs in the centre and two side tabs. The ribbon is woven between them: behind, behind, then in front.
This alternation is not decorative: it is what keeps the ribbon flat and taut at the point of impact. A ribbon passed straight in front of the fork prints pale and shifts sideways with every keystroke.
The slotted plate
Office machines and portables with a central plate
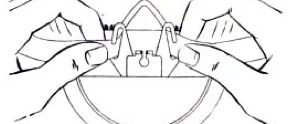
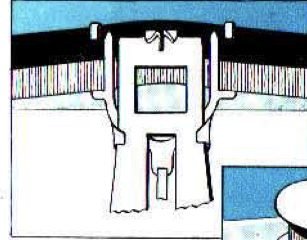
Plate from a period manual, annotated by hand
A central plate pierced with two vertical slots frames the point of impact, with a guide just below. The ribbon passes behind the guide, then slips into the left slot and the right one.
Key point: the full width of the ribbon must be engaged in the slots. If it only goes in halfway, the strike cuts off the letters at the top or the bottom.
The hooked U
American portables — Royal, Remington. The manuals call it the vibrator.
Taking out the old ribbon
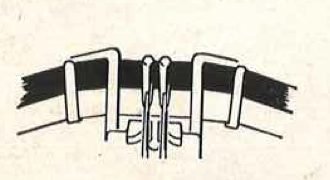
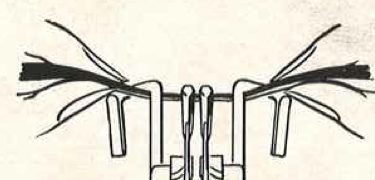
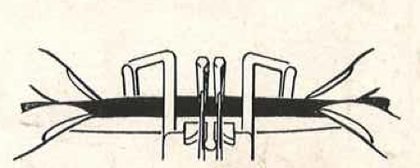
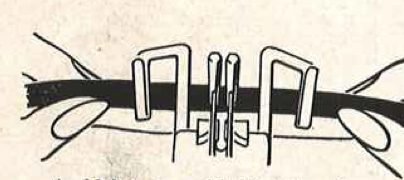
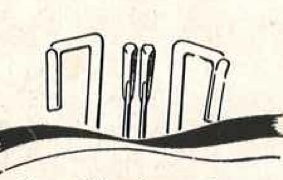
Plates from a Royal Portable manual
The vibrator is a small U-shaped part that rises with every keystroke; on either side, two hooks hold the ribbon. The five plates above show removal : they explain how to free the old ribbon, not how to fit the new one.
Repeat the same sequence in reverse order, from picture 5 to picture 1 : bring the ribbon behind the vibrator, lower it in front of the hooks, then lift it back up to seat it inside. The typebars stay jammed at the point of impact throughout.
This is the manoeuvre that puzzles people most, because it takes three steps and the ribbon seems to take an illogical path. It becomes obvious once you have done it.
Side guides: rollers, slots or lugs
Present on every machine, in different forms
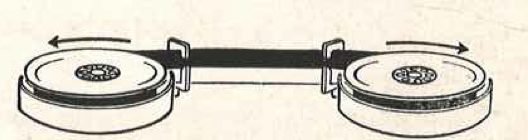
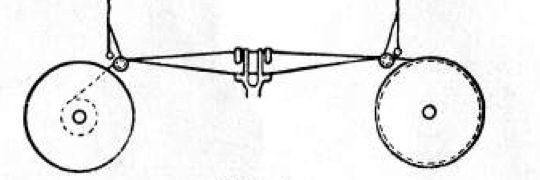
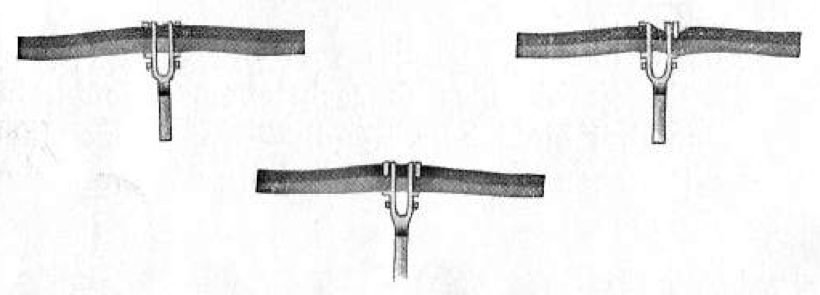
The rollers are not a ribbon holder: they are side guides, and every machine has them in one form or another — a slot, a lug, an eyelet or, here, two small rollers. The part that lifts the ribbon is still one of the three above.
Plates from a period manual, in German
Two small rollers or lugs frame the path, and the lifter sits in the centre. It is going around the rollers that keeps the ribbon taut: if it is routed wrongly, the ribbon advances but never comes back the other way.
On these machines the ribbon is often attached to the spool by an eyelet — remember to leave it between the spool and its roller.
There are variants, and a few machines combine two systems — a slotted ribbon holder with side hooks, for example. In that case the photo you took before dismantling remains the best manual there is. Failing that, the principle is always the same, and if the mechanism resists, a full overhaul at the workshop sets everything right: the ribbon must be flat, across its full width, taut, and free to rise and fall with the part that carries it.
The workshop
The ribbon you need for your machine
Listed by model, shipped within 48 h. A ribbon lasts one to two years depending on use — many of our customers buy two in advance.
 Hugo black and red typewriter ink ribbon
for Olympia, Triumph, Facit…€9.90
 Sand black and red two-colour ink ribbon
for Hermes, Brother, Royal…€9.90
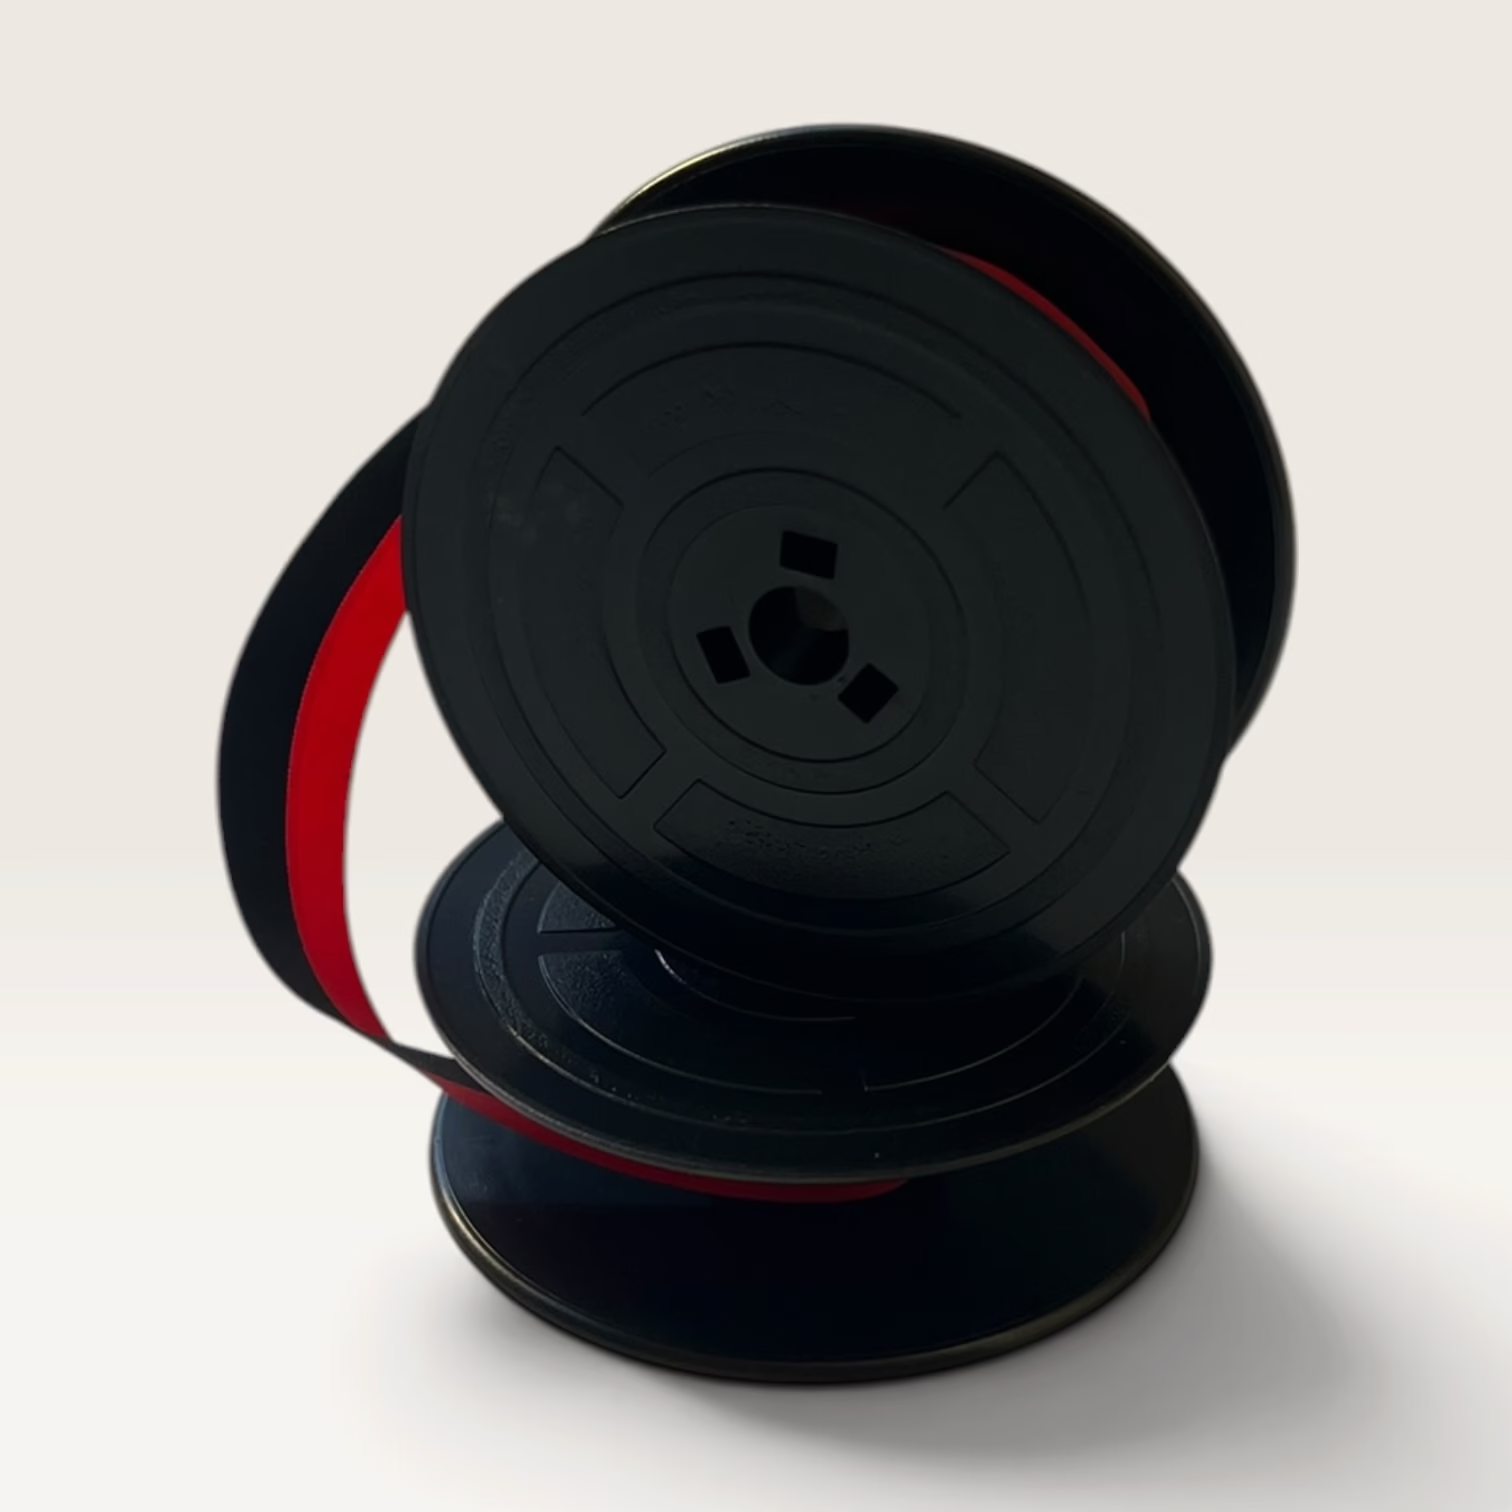 Zola black and red typewriter ink ribbon
for Olivetti…€9.90Pack — 2 ribbons
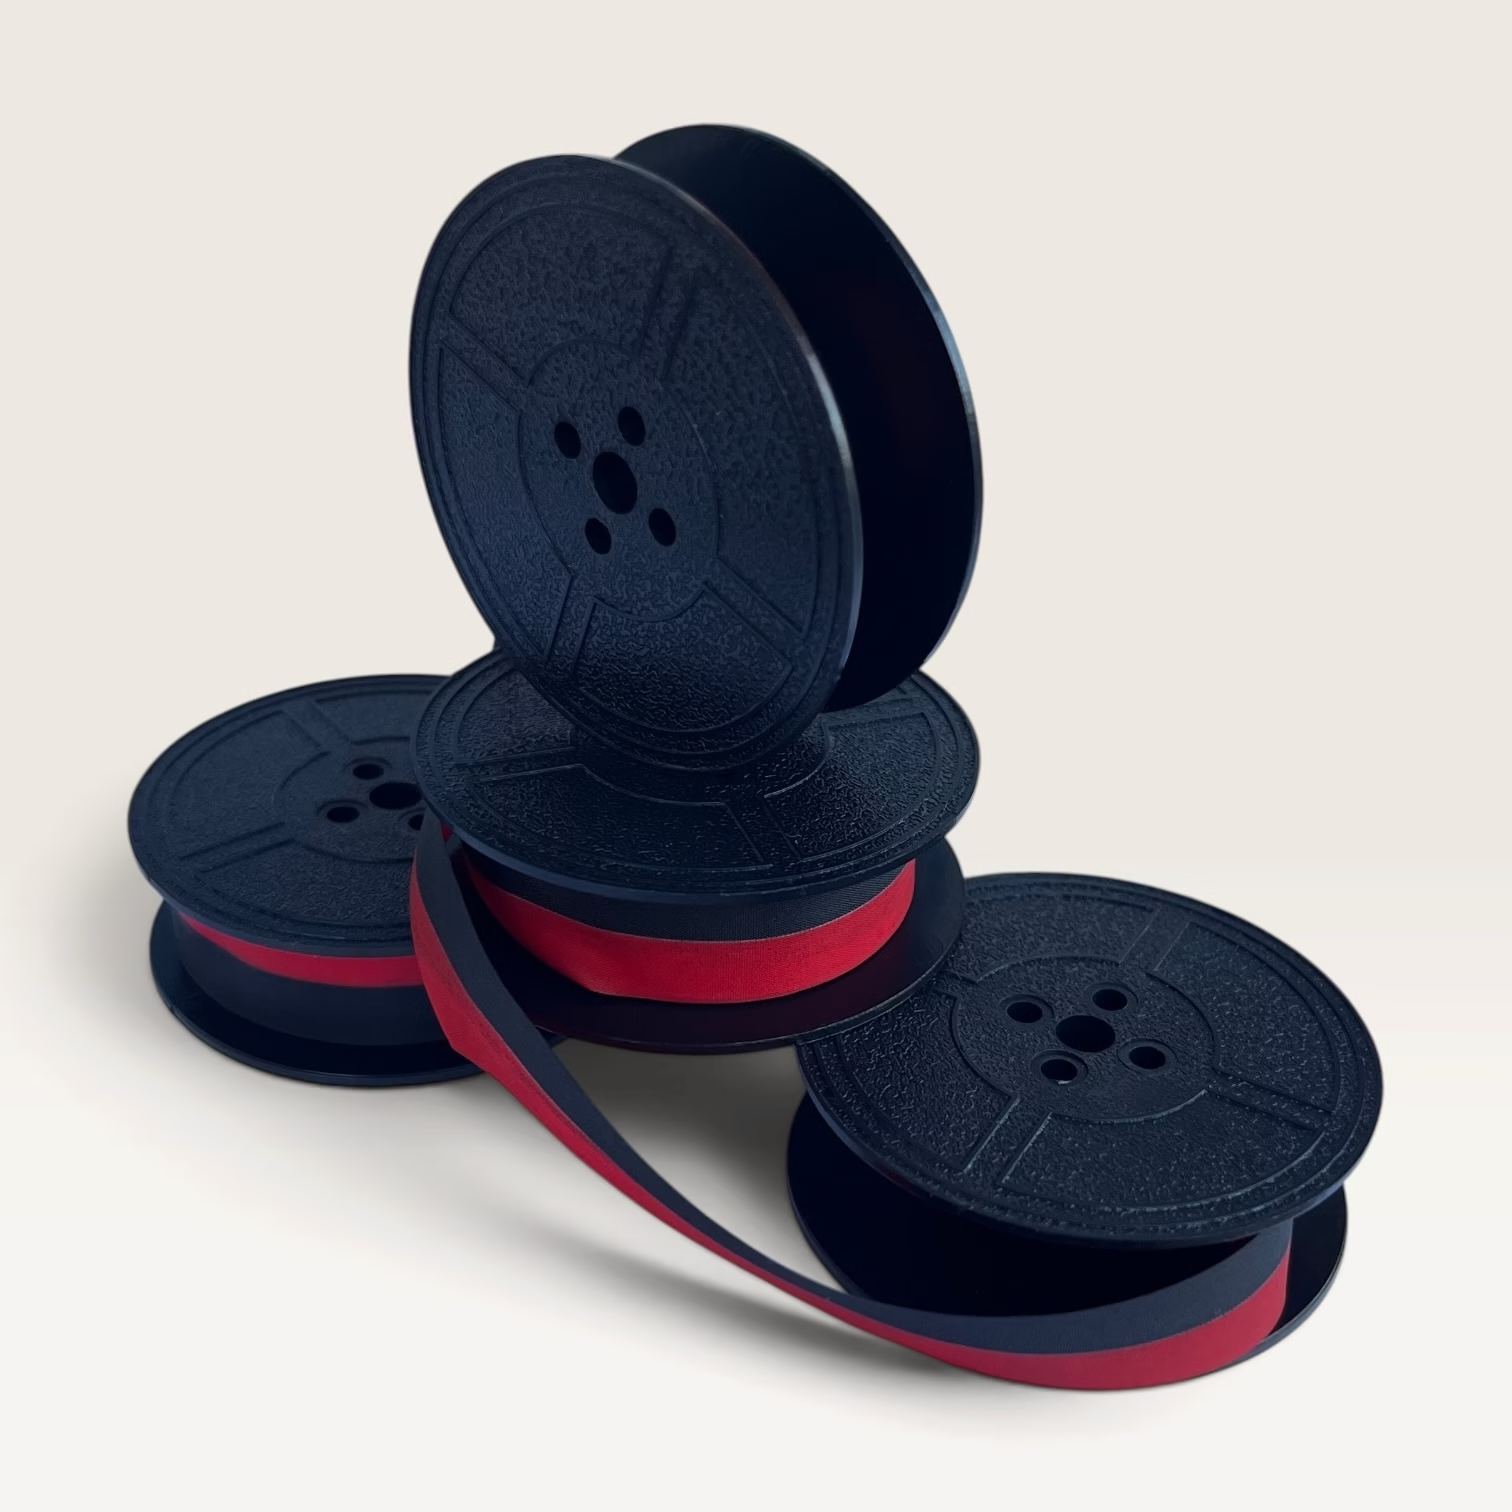 Pack of 2 Sand black and red two-colour ink ribbons
for Hermes, Brother, Royal…€14.90
6The sequence, the checks and the mistakes
Eight steps, four checks and the classic traps
Open up and photograph
Lift the cover, or unclip the front plate depending on the model. Photograph the ribbon's path: an overall view, then a close-up of the ribbon holder.
Wind the old ribbon onto a single spool
Turn the spools by hand until all the ribbon is on one side. You then work without any slack length dragging about, and the empty spool is easier to take out.
Free the ribbon holder
Two-colour selector on red if there is one, shift lock engaged, two centre keys struck together. The typebars stay hooked up and hold the ribbon holder clear.
Free the old ribbon
Take it out of the ribbon holder first, then the two side guides, and only then unhook its ends from the spools. In that order, nothing pulls and nothing tears.
Remove the spools from their shafts — unless your machine requires you to keep them in place, in which case you wind the new ribbon onto them.
Fit the new ribbon
Hook the end onto the hub and put the spools back on their shafts, red side down. Check that they turn freely and that the drive ratchet holds them firmly.
If your machine requires a transfer, this is where you wind the new ribbon onto the spool in place, then wind back about twenty centimetres to get some slack.
Pass the side guides
Engage the ribbon in the slots, around the rollers or under the lugs, depending on your machine. If your ribbon has an eyelet, leave it between the spool and the guide.
Thread the ribbon through the ribbon holder
Go back to the diagram for your system. Hold the ribbon between thumb and forefinger of both hands and bring it in without pulling: you push it, you guide it, you never pull on the strip, which tears and leaves ink on the machine.
When engaging the ribbon in the ribbon holder, turn the lower edge toward you. This is the move the Remington manuals describe, and it avoids the quarter-turn twist that makes the typing crooked.
Release the machine and test it
Unjam the two typebars, release the shift lock, move the selector back to black if there is one. Slip in a sheet and type a full line. The ink should be strong and even across the whole width.
Four checks before closing up
The most common mistakes
The ribbon is only one of the maintenance tasks on a typewriter. For cleaning, lubrication and adjustments, see maintaining a typewriter: the right moves.
Order your ribbon from the workshop
The workshop's ribbons are listed by model — Hermes, Olivetti, Olympia, Brother, Royal, Remington, Underwood, Japy. If you are unsure about the size or the type of spool, send me a photo of your machine and I'll tell you which one you need.
See the ribbons →Plates from period manuals: Royal Portable, Remington Portable, and several manuals for European portables from the 1930s to the 1960s. The text, the drawn diagrams and the step-by-step procedures are the workshop's own.